
New look for web time entry and leave reports

To all staff and student workers:
During the week of spring break, there will be a new look to web time entry and leave reports. This is just a cosmetic change and the functionality will remain the same. You will still enter your hours worked for web time entry, and enter your leave time for leave reports. Below are instructions and a little sneak peek at the new look.
The Office of Human Resources will host open computer lab sessions for those who require assistance. Lab sessions are as follows:
- March 20, 1 p.m. – 3 p.m. Esch 005
- March 21, 10 a.m. – 12 p.m. Esch 005
- March 25, 1 p.m. – 3 p.m. Esch 005
- March 26, 10 a.m. – 12 p.m. Esch 005
Questions? Contact Kelsie Gallion, HRIS analyst, at 317-788-3214.
Web Time Entry instructions
1. Log into Employee Self Service and click on “Enter Time”
2. Click on “Start Timesheet”

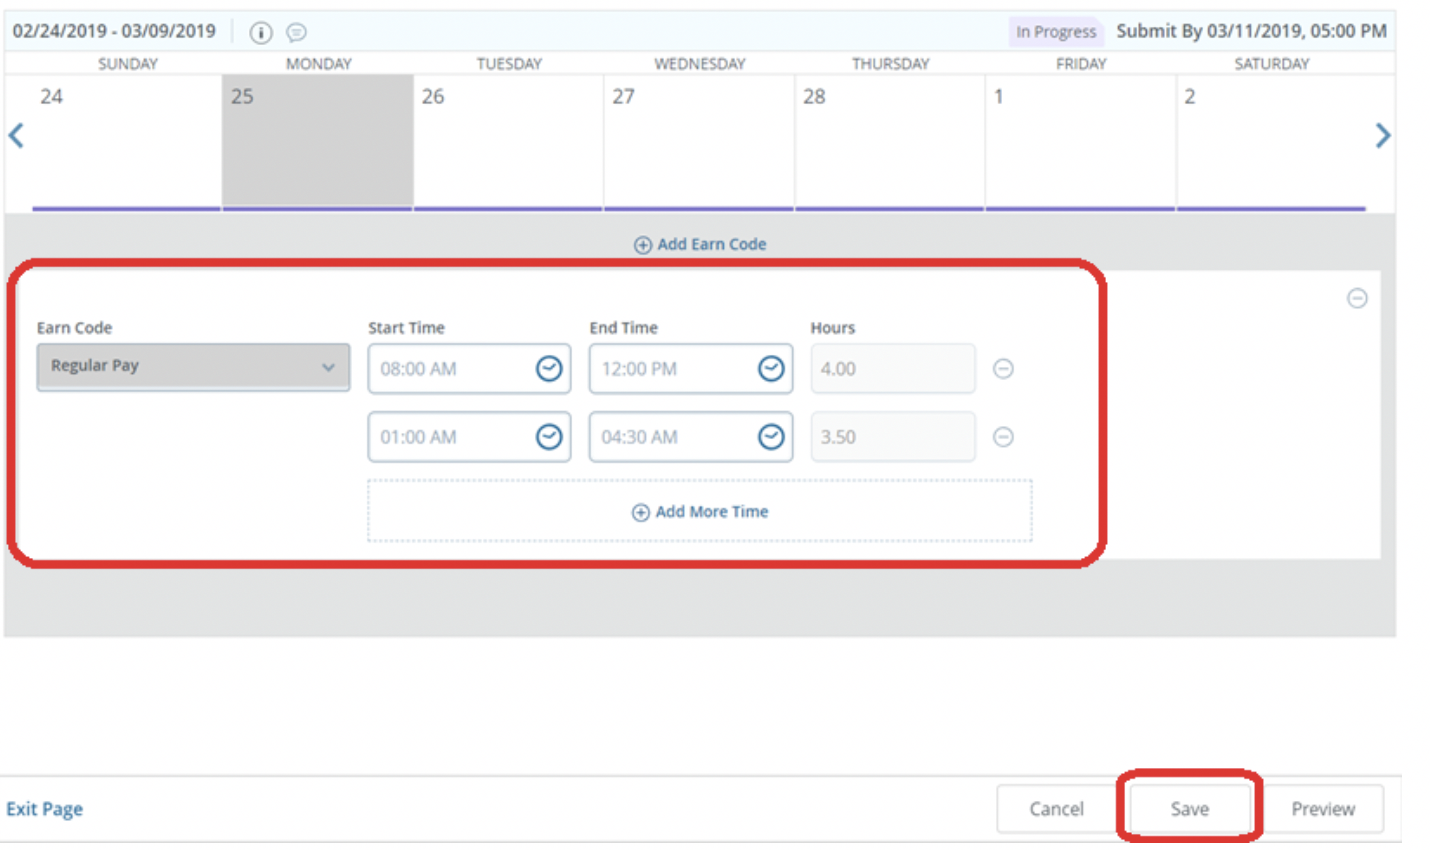
3. Use the “Earn Code” drop down to select the earnings code (regular pay, vacation leave, sick leave, holiday hours, etc.) Enter the start and end time and click “save.”
4. When you have finished entering time for that pay period, click “preview.” A window will appear with a summary of the hours entered. If correct, click “submit”. If incorrect, click “cancel” and make changes.

5. A green box will appear in the upper right-hand corner stating “The timesheet has been successfully submitted.”

6. Click “exit page”. You will be directed to the main timesheet page. You can see the status of the timesheet as “pending.”

Leave Report instructions
1. Log into Employee Self Service and click on “Enter Leave Report.”

2. Click on “Start Leave Report”![]()
3. Use the “Earn Code” drop down to select the earnings code (Vacation Leave, Sick Leave, etc.) Enter the hours and click “Save.”

4. When you have finished entering leave time for that pay period, click “Preview.” A window will appear with a summary of the hours entered. If correct, click “Submit.’ If incorrect, click “Cancel” and make changes.

5. A green box will appear in the upper right-hand corner stating “The Leave Report has been successfully submitted.”
6. Click “Exit Page.” You will be directed to the main Leave Report page. You can see the status of the leave report as “Pending.”
